
🚀 Getting Started with scikit-image 🌟#
Welcome to the world of scikit-image! This Python package lets you process and analyze images 📸 like a pro. Whether you’re detecting objects 🔍, enhancing details 🎨, or doing something super cool like spotting cracks in spaceship panels 🚀, scikit-image has you covered.
Importing scikit-image 🎒#
First things first, you need to import scikit-image. It’s as simple as:
import skimage as ski
import matplotlib.pyplot as plt
Most of scikit-image’s magic 🪄 lives in its submodules. For example:
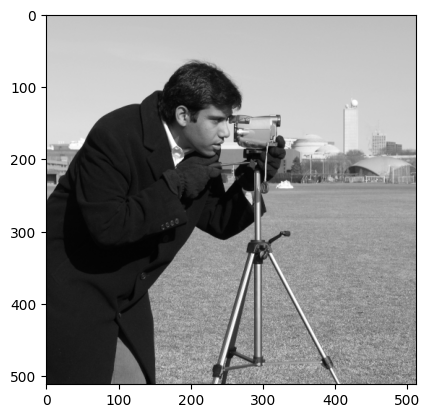
camera = ski.data.camera()
plt.imshow(camera, cmap="gray")
<matplotlib.image.AxesImage at 0x7f5adcb02ed0>
A full list of submodules and functions is available on the API reference webpage.
Images = NumPy Arrays 🤖#
In scikit-image, images are just NumPy arrays. This means you can apply all the powerful tools from NumPy to manipulate and analyze them. For instance:
type(camera)

# A grayscale image with 512 rows and 512 columns
camera.shape
(512, 512)
💡 Fun Fact: This structure is what makes scikit-image so versatile—it doesn’t care if your image is a simple black-and-white picture 🖤🤍 or a colorful snapshot of a nebula 🌌!
Starting with Example Images 📸✨#
To help you hit the ground running, scikit-image provides built-in example images. No need to scramble for test data when you can start with something like this:
coins = ski.data.coins()
threshold_value = ski.filters.threshold_otsu(coins)
threshold_value
np.int64(107)
🎯 Engineering Insight: Otsu’s method is often used in manufacturing to detect defects, such as air bubbles in car tires 🛞 or soldering issues on circuit boards 💻.
Loading Your Own Images 📂➡️🖼️#
If you want to use your own images (e.g., scans of ancient manuscripts 📜 or satellite snapshots 🛰️), scikit-image makes it super easy:
import os
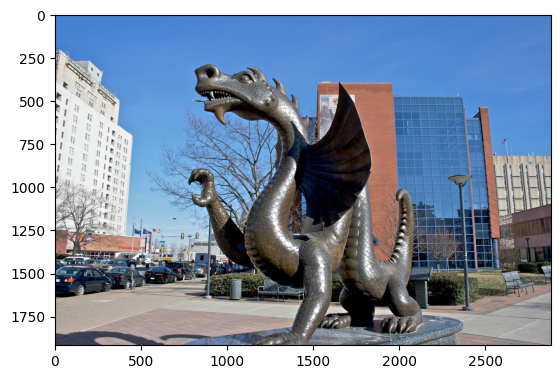
filename = "./assets/figures/Mario_the_Magnificent.jpg"
mario = ski.io.imread(filename)
plt.imshow(mario)
<matplotlib.image.AxesImage at 0x7f5ad6b63b10>
🌙 Engineering Spotlight: Satellite imaging engineers process lunar surface images like these to find safe landing sites for rovers! 🤖🛬
Working with Multiple Images 📁🖼️🖼️🖼️#
Need to load a batch of images for analysis? Let’s say you’re working in a factory inspection system where images are captured every millisecond to spot defects in assembly lines 🔧. Use the natsort package to keep your files in the right order:
from natsort import natsorted

list_files = [
    f for f in os.listdir("../../week_3/readings/assets/figures") if f.endswith(".jpg")
]
list_files
---------------------------------------------------------------------------
ModuleNotFoundError                       Traceback (most recent call last)
Cell In[6], line 1
----> 1 from natsort import natsorted
      3 list_files = [
      4     f for f in os.listdir("../../week_3/readings/assets/figures") if f.endswith(".jpg")
      5 ]
      6 list_files

ModuleNotFoundError: No module named 'natsort'
list_files = natsorted(list_files)
list_files
['Mario_the_Magnificent.jpg',
 'RubberDuck.jpg',
 'axol-regrowth.jpg',
 'axolotl_1.jpg',
 'dust-image.jpg',
 'filp-game-1.jpg',
 'filp-game.jpg',
 'kennedy.jpg',
 'mario-negative-world.jpg',
 'nala.jpg',
 'pressure-vessel-chemistry.jpg',
 'scarface_duck.jpg',
 'tacoma-bridge.jpg',
 'tipu-tiger.jpg']
image_list = []
for filename in list_files:
    image_list.append(
        ski.io.imread(os.path.join("../../week_3/readings/assets/figures", filename))
    )

# This is one of the many ways to make subplots
f, axes = plt.subplots(nrows=3, ncols=len(image_list) // 3 + 1, figsize=(20, 5))

# subplots returns the figure and an array of axes
# we use `axes.ravel()` to turn these into a list
axes = axes.ravel()

# turns all of the axis off
for ax in axes:
    ax.axis("off")

# plots all of the images in the collection
for i, image in enumerate(image_list):
    axes[i].imshow(image, cmap="gray")
    axes[i].set_title(os.path.basename(list_files[i]))

# This cleans the layout of the image
plt.tight_layout()
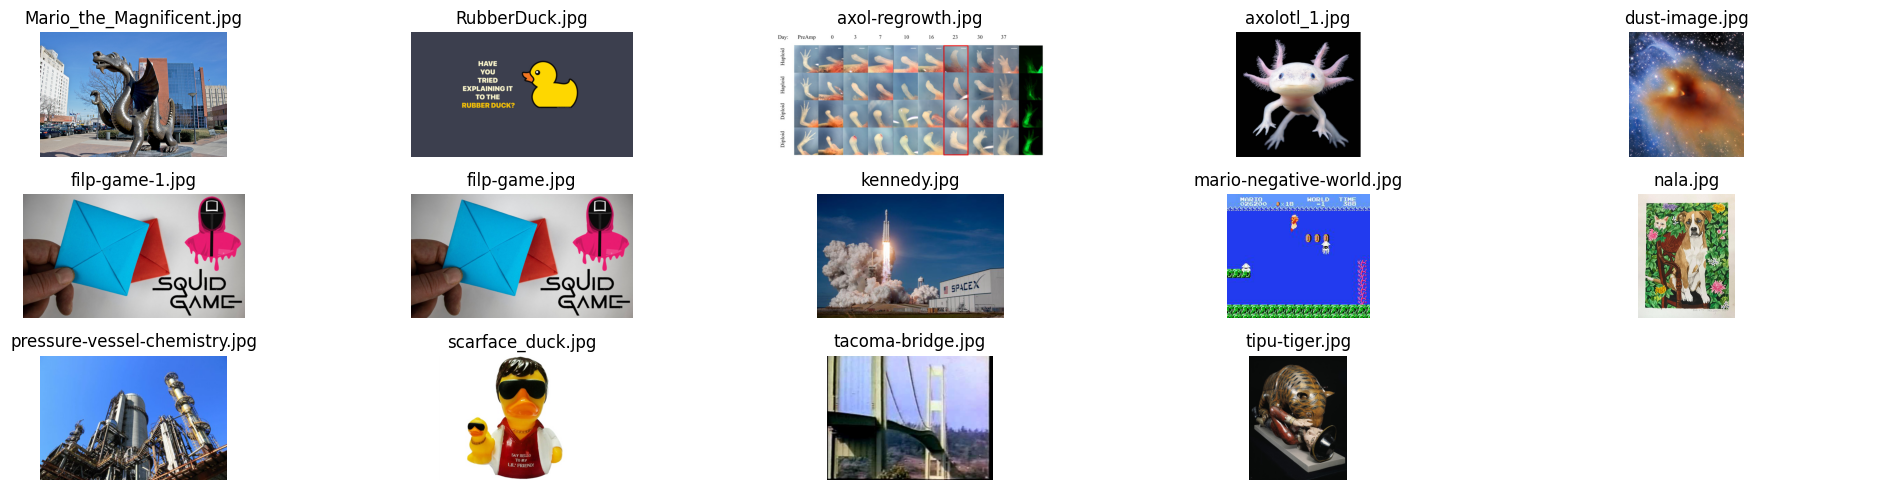
🎉 Now you have all your images loaded in order, ready for further analysis! Imagine using this in a drone 🛸 that scans solar panels for cracks 🌞🔍.
Ready to Dive Deeper? 🌊#
You’ve taken your first steps into the pixel-perfect world of scikit-image. Whether you’re improving product quality 🏭, analyzing biological samples 🔬, or making art out of data 🎨, this toolkit will become your go-to companion.
Let the image adventures begin! 🌟📸